Thanks to some help on the Audacity forum I finally know out how to use Audacity to databend. Previously I’d been using mhWavEdit, which has its limitations and just doesn’t feel as familiar as Audacity. From talk on the various databending discussion boards I found that people would often use tools like Cool Edit/Adobe Audition for their bends. Being on Linux and restricting myself to things that run natively (i.e. not under Wine) presented a new challenge. Part of my task was to replicate the methods others have found but under Linux. My ongoing quest is to find things that only Linux can do, which I’m sure I’ll find when I eventually figure out how to pipe data through one program into another!
Here’s some of my current results using Audacity:
")
")
Just so you don’t have to go trawling through the posts on the Audacity forum here’s how it’s done. It’s worth noting that this was on using Audacity 1.3.12-2 on Linux. Versions on other operating systems may be different. Before I show you this it’s probably better if you work with an uncompressed image format, such as .bmp or .tif. As jpgs are compressed data there’s always more chance of completely breaking a picture, rather than bending it. So, open up GIMP/your faviourite image editor and convert it to an uncompressed format. I’ll be using this picture I took at a Telepaphe gig awhile back.
Next, download Audacity. You don’t need the lame plugin as we wont be exporting to mp3, though grab it if you plan to use it for that feature in the future. Once you have it open go to File > Import > Raw Data and choose your file. What you’ll now be presented is with options on how to import this raw data, which is where I would usually fall flat.

Import Raw Data
Under Encoding you’ll need to select either U-Law or A-Law (remember which one you choose). When you choose any other format you’ll be converting the data into that format. Whilst you want to achieve data modification this is bad because it’ll convert the header of the image file, thereby breaking the image. U/A-Law just imports the data. The other settings do have significance but I wont go into that here. When you’re ready press Import and you’ll see your image as data!

Image as sound
Press play if you dare, but I’d place money on the fact that it’ll probably sound like either white noise or Aphex Twin glitchy goodness. This is where the fun can begin. For this tutorial select everything from about five seconds into the audio. The reason for this is because, just like editing an image in a text editor, the header is at the beginning of the file. Unless you know the size of the header and exactly where it ends (which you can find out with a bit of research), you can usually guess that it’s about a few seconds into the audio. The best way to find it out is to try it out!
Anyway, highlight that section and then go to Effect > Echo

Leave the default settings as they are and press OK
You’ll see that your audio has changed visually. It still wont sound any better but the magic happens when you export it back to an image file, which is the next step.
Once you’re happy with your modifications go to File > Export. Choose a new location for your image and type in the proposed new file name but don’t press save just yet. You’ll need to change the export settings to match the import settings.

Change the file format to Other Uncompressed Files and then click on the Options button.

Export settings
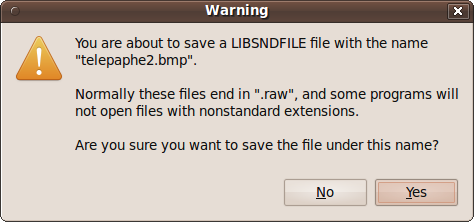
Change the settings to match the ones above (or to A-Law if you imported as A-Law). With that now all set you can now press Save! If you entered a file extension when you were choosing a file name you’ll get a warning about the file extension being incorrect, but you can ignore it and press Yes. If you didn’t choose a file extension, when the file is finished exporting, add the appropriate extension to the file. In my case I’d be adding .bmp to the end.
Here’s the finished image:

Freaky!
There’s of course so many different filters available in Audacity, so try each of them out! If you’re feeling really adventurous try importing two or more different images and then exporting them as a single image.


")

")
