Typewriter text effect

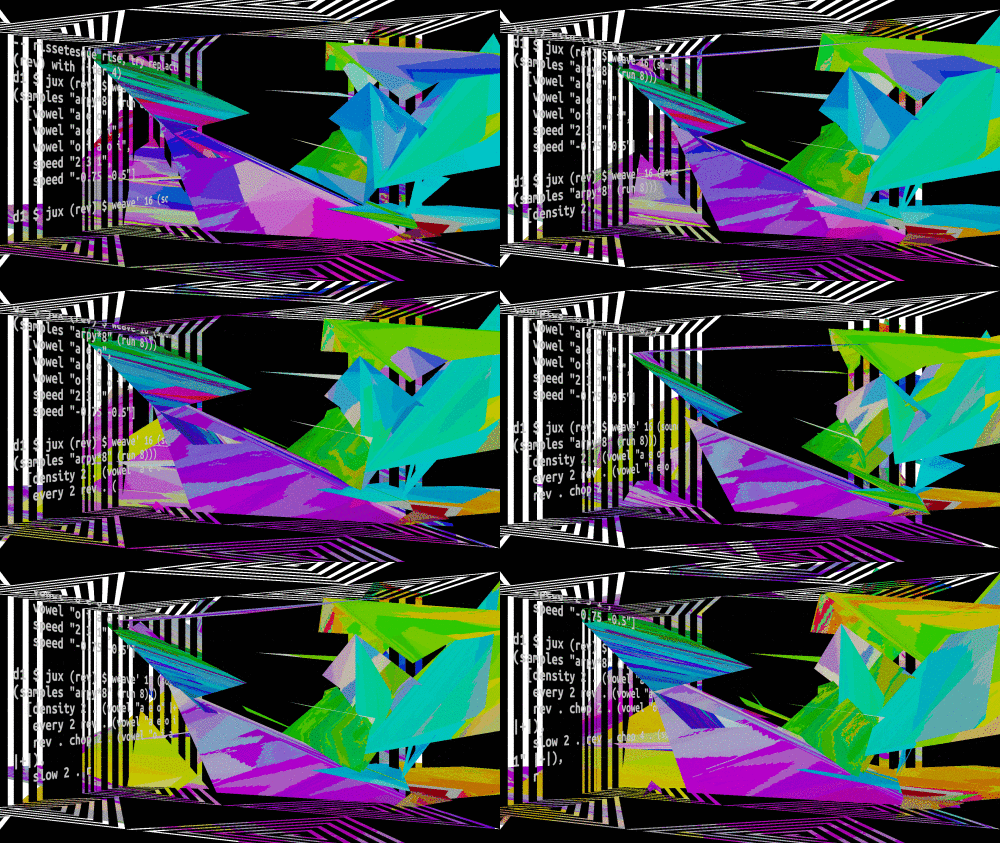
For the Algorave at British Library in April I was asked to make a promotional video for it, which proved a difficult but for a very specific reason. I wanted to emphasise the liveness of live coding and show code being typed. For this I used the code supplied with Alex McLean aka Yaxu’s excellent Peak Cuts EP.

The effect of having the text appear word-by-word or letter-by-letter is often called the typewriter text effect. I’ve previously written about how to do this in Pure Data/GEM. I needed to have a bit more control than what I got in PD, and I needed to export as transparent pngs so this solution wouldn’t work.

Kdenlive once had such an effect built into its title editor. Other solutions that used Kdenlive use a mask to reveal the text, which produced more of a fading in effect that wasn’t ideal. It was also a lot of manual work! I had several hundred lines of text so doing this was going to add a lot of time.

Natron was the next contender. Since 2017 it has had a plugin for doing typewriter text but it’s a bit broken. In theory in gives me the most flexibility in how I create it but in practice I still can’t get it to render!

I also considered using ImageMagick and was even provided with a solution (that was written for Windows). As much as I like automation and command line software, for this very visual task I needed to see what I was working on.

Finally, I turned to Blender, which gave me a few options, including rendering the text as 3D objects within the Blender project itself. After failing to get this Blender addon to work I tried using Animation Nodes. Following a tutorial I was able to set up quite a typewriter effect quite quickly. However, this is where I encountered a bug. After around 10 frames of the text were rendered the rest of the frames would take forever to render. Even in EEVEE each frame was taking about 10 minutes to render. I have no idea why this was. Perhaps it’s because 2.8 is in beta. Maybe because Animations Nodes for 2.8 is also in beta. Beta beta beta. Either way it wasn’t working.

So I thought maybe I could “bake” the animation which would remove the Animation Nodes dependency and maybe speed up the render. Sadly this was also not to be. Text objects can’t be baked 🙁

In the end I had to do an OpenGL render of the animation to pngs with a transparent background. How this differs from a normal render is that it renders the viewport as is. So if you have your gizmos on there it’ll render them out as well. Not ideal but it worked.

I would like to think it all stopped there but it did not.

Blender can have a video or series of images be a texture. However, at the time this was not possible in 2.8 using EEVEE. To my joy, however, this was implemented only a couple of days after i needed it!
Convert Object texture coordinates to UV in Blender

Making digital art is quite a lengthy process and even moreso if you’re using non standard processes or making your own software. For awhile I’ve wanted to write about my processes and how I’ve overcome the bugs and problems. In what will hopefully be a regular series of blog posts I’m going to give a bit of insight into this process. In a way it’ll be a tutorial. Let’s go!

For Visually Similar I wanted to texture each 3D model using lots of images found on the internet. Rather than create one single material containing a texture with all of the found images I instead decided I would add a material for each image texture and, using their alpha channels, composite them over each other.

If you’ve ever had to position something accurately on a UV map you’ll know how much of a pain it can be. So fortunately, in the Texture Coordinate node you can use the Object outlet to another object (usually an empty) as the source of its coordinates. This uses the reference object’s local Z direction as its up direction.

So far,so good, except it did not yet work in Blender’s new EEVEE rendering engine. Yes, yes, I know EEVEE is still under development and shouldn’t be used in production etc. Still, after doing a bit of research it looks like this is going to be implemented.

So, I had a rather smrat idea as a workaround. Could I take the UV coordinates generated by the Object oulet whilst using Cycles and paste those into the UV texture options using a Mapping node? Short answer: no. To do this I would need some sort of viewer or analyser node that would show me the data being output from a node. So, I suggested this idea on the Right-Click Select ideas website. A healthy discussion followed and hopefully something will come of it.

In the end I had to resort to baking the texture and then applying that to the 3D model. In doing this I learnt that baking a UV texture on a complex model will take a lifetime, and so I had to do it on a decimated model and then put that on the original, complex model. This, of course, created some unwanted artefacts. *sadface*

Since I originally encountered this problem it has actually been addressed in a Blender update! However, it only works at render time but it’s progress! 🙂

So that is some insight into how I make some of my art. There’s a lot of problem solving, lots of showstopping bugs and lots of workarounds. Somewhere in that process art is made! I’m hoping to do these every month but we’ll see how that goes.

Blender School, 12th – 29th May 2018

On 12th, 26th and 29th May I’m going to be running a three-part workshops series focusing on how to use Blender.

Blender is a popular free and open source 3D modeling program used by professionals and amateurs for 2D/3D animation, making assets for games, video editing, motion graphics, compositing and more.

Blender school will be a three-part workshop series that will act as an introduction to the software and its features. In these workshops you will be introduced to basic concepts of animation and navigating 3D space, eventually progressing to more advanced concepts and techniques such as particle generators, sculpting and compositing.

In the workshops we will cover:

  • Compositing
  • Interpolation
  • Video Editing
  • Sculpting
  • Modifiers
  • Particles – emitters and hair
  • Navigating Blender’s interface
  • Manipulating and editing objects
  • Using keyframes for animation

Participants will need the following for the workshops:

  • Blender, which can be downloaded here: https://www.blender.org/
  • A laptop. Blender is capable of running on almost all computers. However, as a 3D modeling program it requires more resources than most programs and, preferably, a dedicated graphics card. More details of laptop specification can be found here https://www.blender.org/download/requirements/
  • A three button mouse. Many of the commands in blender require the use of left, right and middle mouse buttons.

Tickets are £20 per workshop. Tickets for the workshops can be purchased here:
12th May, 13:00 – 17:00 – https://www.eventbrite.co.uk/e/blender-school-1-tickets-45729838177
26th May, 13:00 – 17:00 – https://www.eventbrite.co.uk/e/blender-school-2-tickets-45730042789
29th May, 18:00 – 21:00 – https://www.eventbrite.co.uk/e/blender-school-3-tickets-45730155125

Blender School #3

Blender is a popular free and open source 3D modelling program used by professionals and amateurs for 2D/3D animation, making assets for games, video editing, motion graphics, compositing and more.

Blender school will be a three-part workshop series, led by Antonio Roberts, that will act as an introduction to the software and its features. In these workshops you will be introduced to basic concepts of animation and navigating 3D space, eventually progressing to more advanced concepts and techniques such as particle generators, sculpting and compositing.

In this workshop we will cover:

  • Compositing
  • Interpolation
  • Video Editing

Participants will need the following for the workshop:

  • Blender, which can be downloaded here: https://www.blender.org/
  • A laptop. Blender is capable of running on almost all computers. However, as a 3D modelling program it requires more resources than most programs and, preferably, a dedicated graphics card. More details of laptop specification can be found here https://www.blender.org/download/requirements/
  • A three button mouse. Many of the commands in blender require the use of left, right and middle mouse buttons.

Tickets are £20 per workshop. Tickets for this workshop can be purchased here: https://www.eventbrite.co.uk/e/blender-school-3-tickets-45730155125

Blender School #2

Blender is a popular free and open source 3D modelling program used by professionals and amateurs for 2D/3D animation, making assets for games, video editing, motion graphics, compositing and more.

Blender school will be a three-part workshop series, led by Antonio Roberts, that will act as an introduction to the software and its features. In these workshops you will be introduced to basic concepts of animation and navigating 3D space, eventually progressing to more advanced concepts and techniques such as particle generators, sculpting and compositing.

In this workshop we will cover:

  • Sculpting
  • Modifiers
  • Particles – emitters and hair

Participants will need the following for the workshop:

  • Blender, which can be downloaded here: https://www.blender.org/
  • A laptop. Blender is capable of running on almost all computers. However, as a 3D modelling program it requires more resources than most programs and, preferably, a dedicated graphics card. More details of laptop specification can be found here https://www.blender.org/download/requirements/
  • A three button mouse. Many of the commands in blender require the use of left, right and middle mouse buttons.

Tickets are £20 per workshop. Tickets for this workshop can be purchased here: https://www.eventbrite.co.uk/e/blender-school-2-tickets-45730042789

Blender School #1

Blender is a popular free and open source 3D modelling program used by professionals and amateurs for 2D/3D animation, making assets for games, video editing, motion graphics, compositing and more.

Blender school will be a three-part workshop series, led by Antonio Roberts, that will act as an introduction to the software and its features. In these workshops you will be introduced to basic concepts of animation and navigating 3D space, eventually progressing to more advanced concepts and techniques such as particle generators, sculpting and compositing.

In this workshop we will cover:

  • Navigating Blender’s interface
  • Manipulating and editing objects
  • Using keyframes for animation

Participants will need the following for the workshop:

  • Blender, which can be downloaded here: https://www.blender.org/
  • A laptop. Blender is capable of running on almost all computers. However, as a 3D modelling program it requires more resources than most programs and, preferably, a dedicated graphics card. More details of laptop specification can be found here https://www.blender.org/download/requirements/
  • A three button mouse. Many of the commands in blender require the use of left, right and middle mouse buttons.

Tickets are £20 per workshop. Tickets for this workshop can be purchased here: https://www.eventbrite.co.uk/e/blender-school-1-tickets-45729838177

An Introduction to 3D Scanning and Printing, 14 – 16th May

Black Hole Club (the thing that I run) has teamed up with Workshop Birmingham and Backface to present a 3D Scanning and Printing workshop.

3dprintingscanning

Part 1: Saturday 14 May, 10am–5pm.
Venue: Eastside Projects

Led by Tim Milward of backface, a 3D scanning and printing company based in Digbeth, this practical workshop will introduce you to Photogrammetry a 3D scanning process that combines multiple photographic images to create high resolution textured digital ‘objects’ which can be 3D printed or used in digital contexts.

In this practical workshop Tim will demonstrate his professional scanning rig and equipment and will also introduce us to free software that artists and designers can use to make 3D scans. Workshop participants will scan a small object and then, under Tim’s guidance, will use free software to clean up and optimise the resulting 3D mesh and prepare it for 3D printing.

Part 2, Monday 16 May, 6–9pm
Venue: Vivid Projects, Minerva Works, Fazeley St.

Led by artist Antonio Roberts this workshop will introduce participants to Blender a free and open source 3D creation suite which supports the entirety of the 3D pipeline from modeling, rigging and animation to simulation, rendering, compositing and motion tracking.

Using the 3D meshes produced during Part 1 as a starting point, Antonio will introduce the basics of modifying meshes and optimizing them for 3D printing.

Full details are available on the Workshop Birmingham website. The total cost for the two day workshop is £25 and tickets can be bought here.

Making Light Under The Door

On 23rd March the video I made for Light Under The Door by My Panda Shall Fly was released to the public. If you haven’t seen it already, check it out!

This represents a bit of a departure from my usual visuals that feature an onslaught of colour and movement. The track itself is very mellow and dream-like. Having very glitchy visuals just wouldn’t have worked well for this. My approach to making a video for this song was to have a central abstract object that grew and morphed as the song progressed. The background and surrounding objects would move in an erratic but controlled nature, and occasionally the underlying wireframe structure of the environment would be revealed.

mpsf_sketch_1

mpsf_sketch_2

Of course, things always develop as they’re being made.

‎Will it Blend?

The majority of my video work up until now has been made using Pure Data. Whilst a great live performance tool, it is really hard to control minute details. I knew that learning more about video editing and 3D modelling would be beneficial to my overall artistic practice and so I invested time in learning how to use Blender.

blender_mpsf

Blender, for those that don’t know it, is the premier open source tool for working in 3D. It is used by an increasing amount of independent games and graphic design studios (often in conjunction with After Effects and Unity 3D) and has many features that make it really easy to use. Oh, and it’s free! I had dabbled in using Blender for many years, often to make small assets for use in Pure Data or other design work. Making this video required me to learn everything from camera tracking and basic Python scripting to F-Curve modifiers – particularly baking sound to F-Curves and the Blender VSE.

In keeping with my tradition of incorporating randomness, a lot of the movement of the objects is based on external variables. For example, the movement path of the abstract form was determined by a random shape made in Inkscape. The movement of the floating red spheres is being offset (via the Cast modifier) by one of the camera objects which is in itself following a path imported from a random shape made in Inkscape. Phew!

Path of the abstract shape

Path of the abstract shape

Put a glitch on it!

I didn’t intend to use any kind of “traditional” glitch art in this video. When it was suggested that I glitch the video I was initially quite hesitant as it would have felt, and possibly looked, liked an afterthought. I was up for a challenge and so I sought a way to introduce a tiny bit of glitch art without ruining the the overall clean aesthetic of the video.

With the introduction and maturing of the Freestyle renderer, Blender now has the option to export a scene to SVG files.

Original render

Original render

Freestyle SVG render

Freestyle SVG render

This outline would be a great file to start glitching as it would produce results that weren’t too noisy. After rendering the whole video to SVG files I then converted these to transparent PNGs which I then ran through ucnvs pngglitch script.

PNG glitch

PNG glitch

I overlaid this with parts of the video. I made sure to use it sparingly, in a way to mimic the fact that glitches are unexpected bursts of chaos. I think it worked rather nicely!

Feedback

One final addition was the addition of feedback loops. Where would I be without some sort of feedback effect!

mpsf_light_1

mpsf_light_2

The script that made this was conceived after having had only four hours of sleep. The “wrap around” effect is made by making a copy of an image, inverting the colours, scaling it, and placing it behind the original. Script is below. Tested using Imagemagick on Ubuntu 14.10.

Whilst the results are pretty cool the script is terribly slow. I had to use it on all images that had transparent areas. It took two days to render. If anyone has suggestions for making it faster, or any other programming languages that can do the same thing then I would be interested in knowing!

Update

Patrick Borgeat remade the script using Processing and GLSL. It’s a million times faster than my script so git clone it!

You can expect these techniques to be use a lot more in future works. I even aim to make this somehow interactive by using the Blender Game Engine. Watch this space!

Preserving the glitch

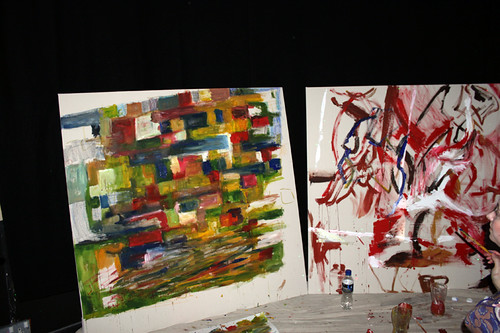
On Thursday 4th March I took part in the AntsArtJam at BitJam in Stoke-on-Trent. Three canvases were set up on the stage and artists were invited to get creative on them as the night went on.

Antonio Roberts (by These Ants)

Photo by These Ants

Those who know me will know that live art is not something that I’ve really done before. I’ve done a fair bit of performing, but nothing like this, so it was quite an exciting challenge.

In my performance I set out to explore how to preserve glitches. Although there are no rules or even strict definitions to terms such as databending or glitch art, to me glitches are naturally occurring errors whereas databending is the act of reproducing an error. Take, for example, my Glitches set and my Databending set on Flickr. Whereas the Databending set is quite full the Glitches set has only three items. I feel this is because it’s harder to capture naturally occurring glitches as you’re often not prepared for them.

To prepare for my performance I downloaded the two movies from the Blender Foundation (Big Buck Bunny and Elephants Dream) and used a modified version of MPEGFucker to databend them. I opened them to at least see if they could be played, but otherwise had no idea what state they were in. This was then projected onto the canvas where I began to paint it.

bITjAM (by These Ants)

Photo by These Ants

I got a few questions asking how I was actually determining what to paint. Afterall, images were zooming by at 24 frames per second, so how would I decide what colour to put where? Overall I was looking for patterns. From the five or so seconds of footage that I’d see I’d try and determine what average value best represented it.

In some ways this is a randomised process. I had only seen seconds of the glitched movie prior to the performance so didn’t know what to expect. Also, marks that I made on the canvas were determined by where my brush was, what colour was on there at the time and what was being projected. To add to this throughout the three-hour performance I didn’t really get to see any of what I was painting, due to the projection onto the canvas. I’m sure there were many occasions where I painted over the same spot many many times.

Here’s the finished product, next to work by Iona Makiola

IMG_0510 (by These Ants)

Photo by These Ants

All of the work from the night, including the video footage that I used, will be exhibited as part of The Talking Shop project in Stoke-on-Trent in the near future

Making a Disco Ball using Blender and Inkscape

Awhile back I started doing a few experiments using Blender and Inkscape together. One of my creations from this was a ball.

Blender/Inkscape Sphere (by hellocatfood)

Recently one Inkscape user created a tutorial describing how to make a disco ball directly in Inkscape. Looking back at that ball that I made it kinda resembles a disco ball, so I decided to write a tutorial on how I did it.

This tutorial assumes that you know at least something about Blender and Inkscape. If not, go look at these tutorials for Inkscape and these tutorials for Blender. As with any program, the more you use it, the better you get at it.

We’re going to need three things before we begin. First install Blender. It’s available for Mac, Windows, Linux and probably any other system you can think of. Did I mention that it’s completely free? Next, install the VRM plugin for Blender. This is a free Blender plugin that allows you to export your Blender objects as an SVG (the file format that Inkscape uses by default). I’ve discussed the usefulness of this plugin before. Lastly, install Inkscape, if you don’t have it already. I’ll be using a beta build of 0.47, which should be officially coming out within the next two weeks. If not, just grab a beta build as it’s pretty stable.

Once you’ve installed these programs open up Blender and you’ll see the cube on screen.

The cube is usually the first thing you see.

The cube is usually the first thing you see.

Depending on how best you work you may want to switch to Camera view. You can do this by either clicking on View > Camera or pressing Num0 (the 0 key on the keypad). What we now see is what the camera sees. If you were to export this as a jpg or SVG this is the angle that you’d see it from.

oooh, shiny 3D!

oooh, shiny 3D!

We need remove this cube and add a UVsphere to the screen. Right-click on the cube and press X or Del to delete it.

Bye bye cube!

Bye bye cube!

To add a UVSphere, in the main window press the Spacebar and then go to Add > Mesh > UVSphere.

Add a UVsphere

Add a UVsphere

You’ll now see another dialogue box asking you to specify the rings and segments. This is important as it’ll define how many tiles there are in your disco ball. Think of these options in this way. The segments option is like the segments of an orange and cuts through the sphere vertically. The rings option cuts through it horizontally. These diagrams might explain it better:

Segments go vertically

Segments go vertically

Rings go horizontally

Rings go horizontally

Put the two together...

Put the two together...

The default is for both to be 32, but, if you want more tiles increase the value and if you want less decrease it. Once you’ve chosen press ok and your sphere should be on screen.

UVsphere

UVsphere

You can reposition, rotate or scale your sphere if needed. To reposition it, with the sphere selected (right-click it if it isn’t selected) press the G key. This grabs the object that’s selected and allows you to move it freely. Try moving your mouse about. This can be useful, but we’re working in a 3D environment which…er.. has three dimensions that you can move along. To move it along a set axis you can either left-click the arrows coming out from the sphere or, after pressing the G key, press the key that corresponds to the axis that you want to move it along. For example, if I wanted to move the sphere along the X axis (the red line) I’d press the G key, the the X key. Now, no matter how I move the mouse the movements of the sphere are constrained to the X axis.

Similarly, to rotate the sphere press the R key and to scale it press the S key. The same rules about constraining it to a certain axis can still apply.

You can do things such as repositioning the camera other such trickery but for that you’ll need to learn more about Blender for that.

With your sphere now ready go to Render (at the top of the screen) and then press VRM.

The VRM options window

The VRM options window

I left the options as they are, but if you feel adventurous have a mess around. When you’re ready press the Render button and then choose the place on your computer to save it and what name to give it and finally press Save SVG. You’ll notice the egg timer appears in place of your mouse cursor to let you know that something’s happening but otherwise there’s a handy progress bar at the top of the screen.

Blender Screenshot

Open up the saved object in Inkscape and voila!

It's an SVG Sphere!

It's an SVG Sphere!

That’s the first part of this tutorial done! The next part draws upon some of my own experiments but is also taken from the original tutorial.

When you’ve opened up the sphere you’ll notice that it’s all one object. This is because all of the paths (the tiles) are grouped into one. You can ungroup it if you want but for this tutorial you don’t need to. Give your object a base a fill and stroke colour. You can do this using either the colour palette at the bottom of the screen or the Fill and Stroke dialogue (Object > Fill and Stroke or Ctrl + Shift + F).

Applying fill and stroke colour

Applying fill and stroke colour

The final step of this tutorial from me is the following. With the base colour selected we’re now going to randomise the colours but within that hue. To do this we’re going to use the randomise filter which is located in (in Inkscape 0.47) Extensions > Color > Randomise.

Leave the Hue option unchecked (unless you want a multicoloured sphere) and then press Apply.

Your finished disco ball!

Your finished disco ball!

There is of course more that you can do to make this disco ball look more realistic but take a look at the tutorial that inspired this one and come up with something of your own 😉

Click to download the SVG

Click to download the SVG