10 years since GLI.TC/H

Exactly 10 years ago the first GLI.TC/H was starting in Chicago, IL. Attending that festival was turning point in my practice and, the more a reflect on it, an important part of my personal life. Here I want to reflect on that a bit.

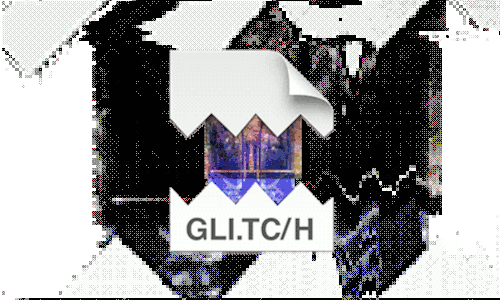
GLI.TC/H is an international gathering of noise & new media practitioners in Chicago from September 29 thru October 03, 2010!

GLI.TC/H features: realtime audio & video performances with artists who misuse and abuse hardware and software; run-time video screenings of corrupt data, decayed media, and destroyed files; workshops and skill-share-sessions highlighting the wrong way to use and build tools; a gallery show examining glitches as processes, systems, and objects; all in the context of ongoing dialogues that have been fostered by experimentation, research, and play. GLI.TC/H is a physical and virtual assembly which stands testament to the energy surrounding these conversations.

Projects take the form of: artware, videos, games, films, tapes, code, interventions, prints, plugins, screen-captures, systems, websites, installations, texts, tools, lectures, essays, code, articles, & hypermedia.

In 2010 I was definitely in a much different place than I am now. I was three years out of university, living in Birmingham and struggling to find my place as an artist. What I was missing, besides paid artistic opportunities, was a community of like-minded people. My life wasn’t completely devoid of artistic activities: I had connected with Constant in Brussels, Belgium and took part in several of their activities; I had started fizzPOP with Nikki Pugh, which opened my eyes to what was possible with technology on a technical level; Being part of/around A.A.S Group taught me a lot about collective noise and art making; BiLE got me thinking about live performance and was my introduction to live visuals. Still, I was looking for more places I could get creative with technology and meet artists using technology. At the time I believed I said I was looking for “software artists”.

HLLEO

Discovering glitch art in 2009 certainly set me on a path to finding that community. From the early days of reading stAllio’s databending tutorials I found myself engrossed in all that it could offer, and it offered quite a lot! The glitch artists freely shared their techniques, code, theories and thoughts on glitch and glitch art. It was really refreshing to see people being so open, especially having come out of universities where knowledge is a luxury accessible only to those with money or willing to accrue debt. Even post university I was put off by tutorials and exhibiting opportunities that were behind paywalls or “pro” subscription models. I would eventually join this sharing with when I documented how to Databend using Audacity.

Gabe, Abbey, L and me

Anyone who knew me at that time would tell you how much glitch art excited me! It was the perfect combination of art, programming and creative exploration. The added randomness inherent in glitch art practices just adds further to the intrigue.

When the announcement of the GLI.TC/H event dropped in my inbox I was really excited! Having my I Am Sitting in A Room video exhibiting there was exciting in itself but what I looked forward to most was meeting all of the people behind the user names whose work I admired. The e-mail communications have long since been deleted, but in that short period between 2009 to mid 2010 I think I had already started dialogues with artists such as Rosa Menkman and Nick Briz and so being able to be around them (and other glitch artists) and exchange knowledge and skills IRL was cool!

I hopped on a plane (the plane ticket being gifted to me as a birthday present) and a short 9 hours later I landed at Chicago O’Hare in the early morning and was greeted at the airport by a smiling Nick Briz. I arrived a couple of days before GLI.TC/H started and so I spent my time meeting other artists, staff and students at SAIC (such as Jon Cates and Jon Satrom, and helped everyone at the venues to get the exhibitions ready.

GLI.TC/H

I immediately felt like I had found the community I was looking for. Everyone I met was so welcoming and friendly. It definitely helps that we were all there because of our shared interest in glitches, but even without this uniting factor everyone was approachable and made the most of the fact we were there in the same place IRL.

GLI.TC/H dinner

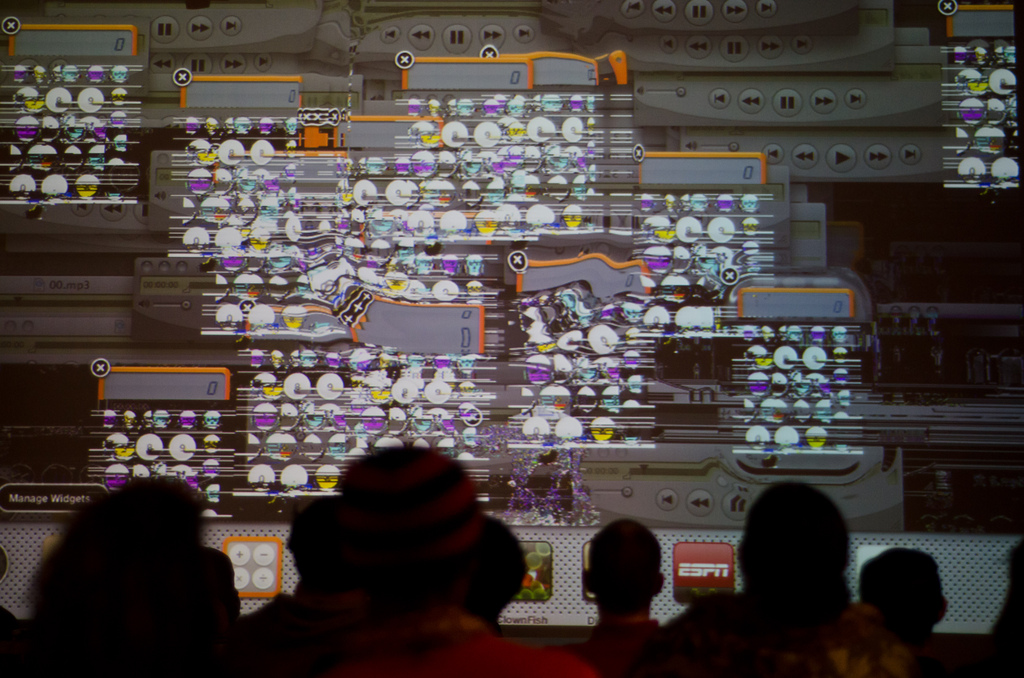
The days and events tat followed was, well, probably one of the best weeks I had of that time. Lots of parties, exhibitions, lectures, presentations, beers, and the biggest pizza I ever had!

I made a very glitchy video diary of my time there:

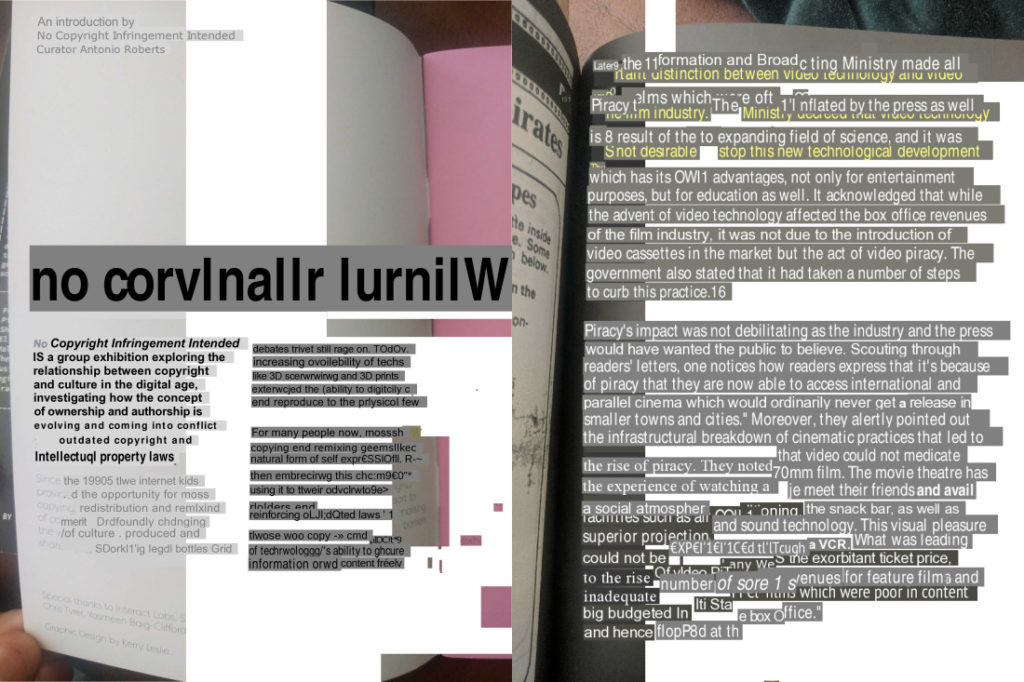
Arriving back in Birmingham I was fully inspired! I had a glimpse of the kinda of community I wanted to see and so put everything into bringing that same spirit and approach to digital art to Birmingham. In the following year I was a guest curator for GLI.TC/H in Birmingham at VIVID. This started my relationship with VIVID (and later Vivid Projects), which carried on for many years and gave me the opportunity to organise more experimental digital art things such as BYOB, Stealth, No Copyright Infringement Intended, and the various exhibitions at Black Hole Club.

Going to GLI.TC/H really benefited my confidence as an artist. It came at a time where I was struggling a lot but being around a community of friendly people showed me that there was a place – both and offline – for the weird glitchy stuff that I wanted to make!

I’ve been following the practices of many of the people I met and it’s been inspiring watching them develop and see how, or even if, glitch art continues to be a part of it. Personally glitch art still is a part of my practice but more as a tool and method rather than the conceptual focus.

I’ll wrap up now and say that GLI.TC/H was great! Thanks to the GLI.TC/H Bots for making it happen.

OCR to Text to Speech

For the sixth video in the Design Yourself series the group worked with artist Erica Scourti. For the activity the participants used optical character recognition software (OCR) to generate poetry from their own handwriting and writing (leaflets, signage) found throughout the Barbican building.

The next stage in the workshop was going to be to take this extracted text and run it through a text to speech synthesizer, but unfortunately there wasn’t time to get to this stage.

One of the things I liked about the software they used was that it showed you the image of the text that it recognised and extracted, producing a kind of cut-and-paste poetry.

To make the sixth video I wanted to somehow utilize this OCR and text-to-speech process and make a video collage of words and synthesized speech. The challenge was finding a way to do this using only open source software. Finding open source OCR software that works on Linux is not a problem. After a while I discovered that Tesseract is the gold standard for OCR software and that most other software act as frontends or interfaces to it. Here’s a few examples:

However, they all output only the text, and not the image of the extracted text. I’m aware that my use case is quite specific so I don’t blame the developers for this.

Eventually I took to Twitter and Mastodon with my questions. _vade pointed to a bug report on Tesseract which showed that getting the coordinates of recognised words is possible in Tesseract. If I knew the coordinates of words then perhaps I could use that to extract the image of the word. However, doing it this way required using it’s C interface and learning C wasn’t feasible at the time.

After some further digging around Tesseract I found a bug report that makes reference to hOCR files:

hOCR is an open standard of data representation for formatted text obtained from optical character recognition (OCR). The definition encodes text, style, layout information, recognition confidence metrics and other information using Extensible Markup Language (XML) in the form of Hypertext Markup Language (HTML) or XHTML.

This file looked like it contained the coordinate data I needed, and obtaining such a file from Tesseract was as simple as running one command. The next task was finding a tool (or tools) to interpret hOCR files. Here’s a selection, which should really be added the the previous list to form a mega-list:

hocr-tools proved to be the most feature complete and stable. It runs on the command line, which opens it up for easy automation and combining with other programs. After reading the documentation I found a process for extracting the images of words and even making videos from each word/sentence with synthesized speech. Here’s how I did it:

Generate hOCR file

First I needed to generate a hOCR file using Tesseract. For the example I used the first page from the first chapter of No Logo by Naomi Klein.

tesseract book.jpg book hocr

This produced a file called book.hocr. If you look at the source code of the file you can see it contains the bounding box coordinates of each word and line.

Extract images

Using the hOCR file I can extract images of the lines

hocr-extract-images -P 10 book.hocr

This generates both pngs of each line and also a corresponding text file containing the text

Text to speech

Using eSpeak I can generate a wav file of a synthesized voice reading each line.

for file in *.txt ; do espeak -z -f $file -w ${file%.*}.wav ; done

Make video clips

Finally, I needed to combine the png image of the text with the wav file of the synthesized speech into a video

for i in $(seq -f "%03g" 1 83) ; do ffmpeg -loop 1 -i line-$i.png -i line-$i.wav -c:v libx264 -tune stillimage -vf scale="width=ceil(iw/2)*2:height=ceil(ih/2)*2" -pix_fmt yuv420p -shortest -fflags +shortest ${i%.*}.mp4 -y ; done

I used fflags because without it the video was always adding a couple of seconds of silence.

By the end of this I had a folder full of lots of files.

Voila!

The last part of this was to manually arrange the video clips into a video collage. I made this example video to demonstrate to the group what could be done.

Getting to this point took some time but with what I’ve learnt I can replicate this process quickly and simply. In the end the group decided no to use OCR to generate text and instead wrote something themselves. They did still use text-to-speech software and even filmed themselves miming to it. Here’s the finished video:

This was the last video I made for the Design Yourself project. I’ve written about techniques used to make older videos in past blog posts. Go read the Barbican website for more information on the project

Motion Interpolation for Glitch Aesthetics using FFmpeg part 9

Below are a few examples of how you can use FFmpeg’s minterpolate to create artworks with a glitch aesthetic.

You can read about how I used it for an artwork in this blog post. You can also grab the source file for these videos here. Give it a try yourself!

mc_mode=aobmc:me_mode=bilat:me=ds

ffmpeg -i cat_rainbow_original.mp4 -filter:v "setpts=62.5*PTS,minterpolate='fps=25:mb_size=16:search_param=400:vsbmc=0:scd=none:mc_mode=aobmc:me_mode=bilat:me=ds'" 033_mc_mode=aobmc_me_mode=bilat_me=ds.mp4

mc_mode=aobmc:me_mode=bilat:me=hexbs

ffmpeg -i cat_rainbow_original.mp4 -filter:v "setpts=62.5*PTS,minterpolate='fps=25:mb_size=16:search_param=400:vsbmc=0:scd=none:mc_mode=aobmc:me_mode=bilat:me=hexbs'" 034_mc_mode=aobmc_me_mode=bilat_me=hexbs.mp4

mc_mode=aobmc:me_mode=bilat:me=epzs

ffmpeg -i cat_rainbow_original.mp4 -filter:v "setpts=62.5*PTS,minterpolate='fps=25:mb_size=16:search_param=400:vsbmc=0:scd=none:mc_mode=aobmc:me_mode=bilat:me=epzs'" 035_mc_mode=aobmc_me_mode=bilat_me=epzs.mp4

mc_mode=aobmc:me_mode=bilat:me=umh

ffmpeg -i cat_rainbow_original.mp4 -filter:v "setpts=62.5*PTS,minterpolate='fps=25:mb_size=16:search_param=400:vsbmc=0:scd=none:mc_mode=aobmc:me_mode=bilat:me=umh'" 036_mc_mode=aobmc_me_mode=bilat_me=umh.mp4

This blog post is part of a series. Click the links below to see more examples of FFmpeg’s motion interpolation:

Motion Interpolation for Glitch Aesthetics using FFmpeg part 8

Below are a few examples of how you can use FFmpeg’s minterpolate to create artworks with a glitch aesthetic.

You can read about how I used it for an artwork in this blog post. You can also grab the source file for these videos here. Give it a try yourself!

mc_mode=aobmc:me_mode=bilat:me=tss

ffmpeg -i cat_rainbow_original.mp4 -filter:v "setpts=62.5*PTS,minterpolate='fps=25:mb_size=16:search_param=400:vsbmc=0:scd=none:mc_mode=aobmc:me_mode=bilat:me=tss'" 029_mc_mode=aobmc_me_mode=bilat_me=tss.mp4

mc_mode=aobmc:me_mode=bilat:me=tdls

ffmpeg -i cat_rainbow_original.mp4 -filter:v "setpts=62.5*PTS,minterpolate='fps=25:mb_size=16:search_param=400:vsbmc=0:scd=none:mc_mode=aobmc:me_mode=bilat:me=tdls'" 030_mc_mode=aobmc_me_mode=bilat_me=tdls.mp4

mc_mode=aobmc:me_mode=bilat:me=ntss

ffmpeg -i cat_rainbow_original.mp4 -filter:v "setpts=62.5*PTS,minterpolate='fps=25:mb_size=16:search_param=400:vsbmc=0:scd=none:mc_mode=aobmc:me_mode=bilat:me=ntss'" 031_mc_mode=aobmc_me_mode=bilat_me=ntss.mp4

mc_mode=aobmc:me_mode=bilat:me=fss

ffmpeg -i cat_rainbow_original.mp4 -filter:v "setpts=62.5*PTS,minterpolate='fps=25:mb_size=16:search_param=400:vsbmc=0:scd=none:mc_mode=aobmc:me_mode=bilat:me=fss'" 032_mc_mode=aobmc_me_mode=bilat_me=fss.mp4

This blog post is part of a series. Click the links below to see more examples of FFmpeg’s motion interpolation:

Motion Interpolation for Glitch Aesthetics using FFmpeg part 7

Below are a few examples of how you can use FFmpeg’s minterpolate to create artworks with a glitch aesthetic.

You can read about how I used it for an artwork in this blog post. You can also grab the source file for these videos here. Give it a try yourself!

mc_mode=obmc:me_mode=bilat:me=hexbs

ffmpeg -i cat_rainbow_original.mp4 -filter:v "setpts=62.5*PTS,minterpolate='fps=25:mb_size=16:search_param=400:vsbmc=0:scd=none:mc_mode=obmc:me_mode=bilat:me=hexbs'" 025_mc_mode=obmc_me_mode=bilat_me=hexbs.mp4

mc_mode=obmc:me_mode=bilat:me=epzs

ffmpeg -i cat_rainbow_original.mp4 -filter:v "setpts=62.5*PTS,minterpolate='fps=25:mb_size=16:search_param=400:vsbmc=0:scd=none:mc_mode=obmc:me_mode=bilat:me=epzs'" 026_mc_mode=obmc_me_mode=bilat_me=epzs.mp4

mc_mode=obmc:me_mode=bilat:me=umh

ffmpeg -i cat_rainbow_original.mp4 -filter:v "setpts=62.5*PTS,minterpolate='fps=25:mb_size=16:search_param=400:vsbmc=0:scd=none:mc_mode=obmc:me_mode=bilat:me=umh'" 027_mc_mode=obmc_me_mode=bilat_me=umh.mp4

mc_mode=aobmc:me_mode=bilat:me=esa

ffmpeg -i cat_rainbow_original.mp4 -filter:v "setpts=62.5*PTS,minterpolate='fps=25:mb_size=16:search_param=400:vsbmc=0:scd=none:mc_mode=aobmc:me_mode=bilat:me=esa'" 028_mc_mode=aobmc_me_mode=bilat_me=esa.mp4

This blog post is part of a series. Click the links below to see more examples of FFmpeg’s motion interpolation:

Motion Interpolation for Glitch Aesthetics using FFmpeg part 6

Below are a few examples of how you can use FFmpeg’s minterpolate to create artworks with a glitch aesthetic.

You can read about how I used it for an artwork in this blog post. You can also grab the source file for these videos here. Give it a try yourself!

mc_mode=obmc:me_mode=bilat:me=tdls

ffmpeg -i cat_rainbow_original.mp4 -filter:v "setpts=62.5*PTS,minterpolate='fps=25:mb_size=16:search_param=400:vsbmc=0:scd=none:mc_mode=obmc:me_mode=bilat:me=tdls'" 021_mc_mode=obmc_me_mode=bilat_me=tdls.mp4

mc_mode=obmc:me_mode=bilat:me=ntss

ffmpeg -i cat_rainbow_original.mp4 -filter:v "setpts=62.5*PTS,minterpolate='fps=25:mb_size=16:search_param=400:vsbmc=0:scd=none:mc_mode=obmc:me_mode=bilat:me=ntss'" 022_mc_mode=obmc_me_mode=bilat_me=ntss.mp4

mc_mode=obmc:me_mode=bilat:me=fss

ffmpeg -i cat_rainbow_original.mp4 -filter:v "setpts=62.5*PTS,minterpolate='fps=25:mb_size=16:search_param=400:vsbmc=0:scd=none:mc_mode=obmc:me_mode=bilat:me=fss'" 023_mc_mode=obmc_me_mode=bilat_me=fss.mp4

mc_mode=obmc:me_mode=bilat:me=ds

ffmpeg -i cat_rainbow_original.mp4 -filter:v "setpts=62.5*PTS,minterpolate='fps=25:mb_size=16:search_param=400:vsbmc=0:scd=none:mc_mode=obmc:me_mode=bilat:me=ds'" 024_mc_mode=obmc_me_mode=bilat_me=ds.mp4

This blog post is part of a series. Click the links below to see more examples of FFmpeg’s motion interpolation:

Motion Interpolation for Glitch Aesthetics using FFmpeg part 5

Below are a few examples of how you can use FFmpeg’s minterpolate to create artworks with a glitch aesthetic.

You can read about how I used it for an artwork in this blog post. You can also grab the source file for these videos here. Give it a try yourself!

mc_mode=aobmc:me_mode=bidir:me=epzs

ffmpeg -i cat_rainbow_original.mp4 -filter:v "setpts=62.5*PTS,minterpolate='fps=25:mb_size=16:search_param=400:vsbmc=0:scd=none:mc_mode=aobmc:me_mode=bidir:me=epzs:'" 017_mc_mode=aobmc_me_mode=bidir_me=epzs.mp4

mc_mode=aobmc:me_mode=bidir:me=umh

ffmpeg -i cat_rainbow_original.mp4 -filter:v "setpts=62.5*PTS,minterpolate='fps=25:mb_size=16:search_param=400:vsbmc=0:scd=none:mc_mode=aobmc:me_mode=bidir:me=umh'" 018_mc_mode=aobmc_me_mode=bidir_me=umh.mp4

mc_mode=obmc:me_mode=bilat:me=esa

ffmpeg -i cat_rainbow_original.mp4 -filter:v "setpts=62.5*PTS,minterpolate='fps=25:mb_size=16:search_param=400:vsbmc=0:scd=none:mc_mode=obmc:me_mode=bilat:me=esa'" 019_mc_mode=obmc_me_mode=bilat_me=esa.mp4

mc_mode=obmc:me_mode=bilat:me=tss

ffmpeg -i cat_rainbow_original.mp4 -filter:v "setpts=62.5*PTS,minterpolate='fps=25:mb_size=16:search_param=400:vsbmc=0:scd=none:mc_mode=obmc:me_mode=bilat:me=tss'" 020_mc_mode=obmc_me_mode=bilat_me=tss.mp4

This blog post is part of a series. Click the links below to see more examples of FFmpeg’s motion interpolation:

Motion Interpolation for Glitch Aesthetics using FFmpeg part 4

Below are a few examples of how you can use FFmpeg’s minterpolate to create artworks with a glitch aesthetic.

You can read about how I used it for an artwork in this blog post. You can also grab the source file for these videos here. Give it a try yourself!

mc_mode=aobmc:me_mode=bidir:me=ntss

ffmpeg -i cat_rainbow_original.mp4 -filter:v "setpts=62.5*PTS,minterpolate='fps=25:mb_size=16:search_param=400:vsbmc=0:scd=none:mc_mode=aobmc:me_mode=bidir:me=ntss'" 013_mc_mode=aobmc_me_mode=bidir_me=ntss.mp4

mc_mode=aobmc:me_mode=bidir:me=fss

ffmpeg -i cat_rainbow_original.mp4 -filter:v "setpts=62.5*PTS,minterpolate='fps=25:mb_size=16:search_param=400:vsbmc=0:scd=none:mc_mode=aobmc:me_mode=bidir:me=fss'" 014_mc_mode=aobmc_me_mode=bidir_me=fss.mp4

mc_mode=aobmc:me_mode=bidir:me=ds

ffmpeg -i cat_rainbow_original.mp4 -filter:v "setpts=62.5*PTS,minterpolate='fps=25:mb_size=16:search_param=400:vsbmc=0:scd=none:mc_mode=aobmc:me_mode=bidir:me=ds'" 015_mc_mode=aobmc_me_mode=bidir_me=ds.mp4

mc_mode=aobmc:me_mode=bidir:me=hexbs

ffmpeg -i cat_rainbow_original.mp4 -filter:v "setpts=62.5*PTS,minterpolate='fps=25:mb_size=16:search_param=400:vsbmc=0:scd=none:mc_mode=aobmc:me_mode=bidir:me=hexbs'" 016_mc_mode=aobmc_me_mode=bidir_me=hexbs.mp4

This blog post is part of a series. Click the links below to see more examples of FFmpeg’s motion interpolation: