Typewriter Text Revisited Revisited

This ongoing adventure to create a typewriter text effect has had a lot of twists and turns over the years. Back in 2011 I used Pure Data to achieve this effect. Fast forward to 2019 and I experimented with Kdenlive and Natron before settling on Animation Nodes. In April 2020 update on this I detailed how I used Animation Nodes and attempted to use Aegisub to create this effect. Around the same time I had started experimenting with expressions in Natron to achieve the same effect.

The value of a parameter can be set by Python expressions. An expression is a line of code that can either reference the value of other parameters or apply mathematical functions to the current value.

The expression will be executed every times the value of the parameter is fetched from a call to getValue(dimension) or get().

In theory with Natron expressions I could created a counter that would increment on every frame and type words out character by character. Y’know, like a typewriter. I’m forever learning Python so after a lot of effort, and a lot of help from people on the Natron forum I came up with the following solution. In the Text node I entered the following expression:

originalText = original.text.get()
output = " "
ptr = 0
slowFac = 4
for i in range(frame/slowFac, len(originalText)+1):
	if frame/slowFac < len(originalText):
		ptr=frame/slowFac
	else:
		ptr=len(originalText)
ret = originalText[0:ptr]

A fellow Natron user greatly simplified the code and presented the following solution:

text = Text1.text.get()
ret = text[:frame-1]

Success! I used this in the last video for Design Yourself:

The typewriter text effect starts from 01:04. The same Natron user also posted an alternative solution.

I noticed a bug which meant that I couldn’t change the speed that the letters typed out at. One method of speeding up the text would be to use ret = text[:frame*2-1] or a different multiplier. However, I wanted something a little bit more precise, so I thought about using the Retime node. Unfortunately there was a bug which prevented this. The workaround of using a Constant node worked. In the end it got fixed, but not in time for making that Design Yourself video.

In June I was asked if I could make an intro video for Network music Festival. The organisers wanted around 10 slides of text to appear throughout the video. Some had only several words on them but some had large blocks of text.

I already decided that I wanted to use the typewriter text effect to make the text appear and then to hold that text for a couple of seconds. This presented an interesting problem. Without a Retime node the text appears one character per frame. With a large block of text 250 characters in length (including spaces) this would take, well, 240 frames to appear, which at 24 fps would be 10 seconds. The organisers wanted the video to be about a minute long, so having one slide take up 10 seconds would be far too long.

What I needed was a method for making an arbitrary amount of text to appear within a specific time/frame count. My final Natron expression (after a bit of bug fixing) looked like this.

text = Source.text.get()
letter= 0

# what frame to start triggering the write-on effect
trigger = 15

# how many frames it'll take to write the full text
length = 46

# map values. Taken from herehttps://stackoverflow.com/a/1969274
def translate(value, leftMin, leftMax, rightMin, rightMax):
    # Figure out how 'wide' each range is
    leftSpan = leftMax - leftMin
    rightSpan = rightMax - rightMin

    # Convert the left range into a 0-1 range (float)
    valueScaled = float(value - leftMin) / float(leftSpan)

    # Convert the 0-1 range into a value in the right range.
    return rightMin + (valueScaled * rightSpan)


if  frame >= trigger:
	letter = int(ceil(translate(frame-trigger, 1, length, 1, len(text))))
else:
	letter = 0

ret= text[:letter]

This expression does several things. It first allows a user to specify at which frame the text will appear (trigger). Then, no matter how much input text there is it will be mapped to the length value. Oddly Python doesn’t have a built in mapping function so I had to use the one from here. Unfortunately it doesn’t work as expected if your Text node has keyframed text changes. So, for that you’ll have to have multiple Text nodes. Here’s the finished Network Music Festival video.

Blender Animation Workshop – July 25th

On Saturday July 25th I’ll be delivering an online a Blender workshop for Access Space!

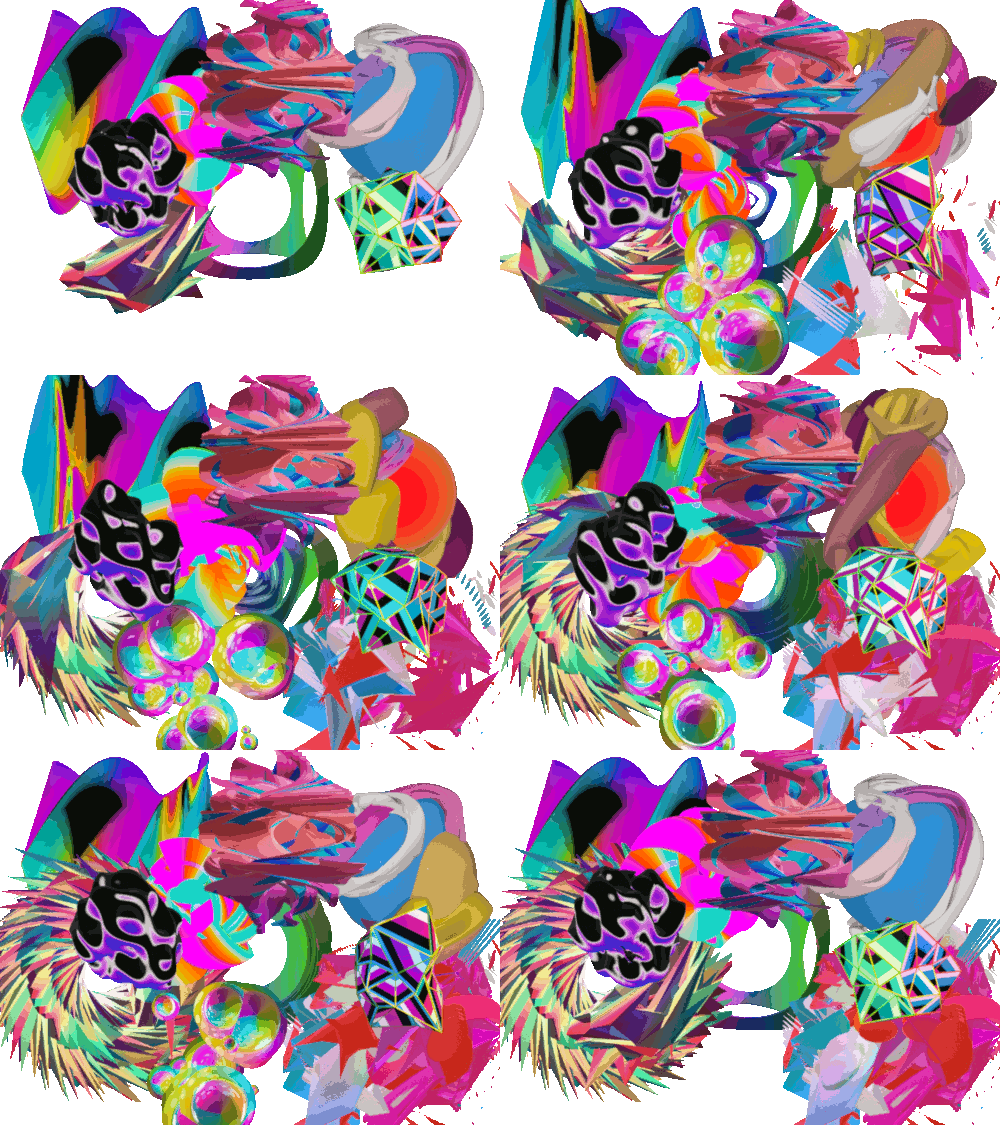
The three-hour workshop (13:00 – 16:00) will go through a few basics of using Blender but will mainly focus on making abstract glitchy looping gifs, like the ones that I made for Improviz.

Tickets are £15 and can be purchased directly from Access Space.

OCR to Text to Speech

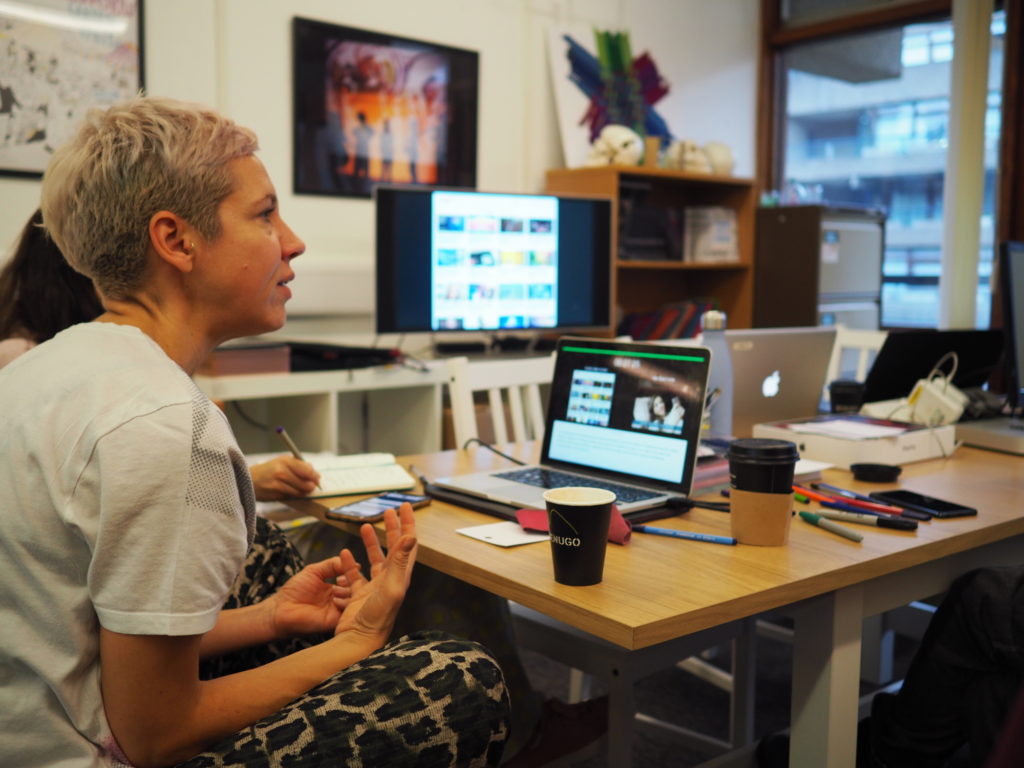
For the sixth video in the Design Yourself series the group worked with artist Erica Scourti. For the activity the participants used optical character recognition software (OCR) to generate poetry from their own handwriting and writing (leaflets, signage) found throughout the Barbican building.

The next stage in the workshop was going to be to take this extracted text and run it through a text to speech synthesizer, but unfortunately there wasn’t time to get to this stage.

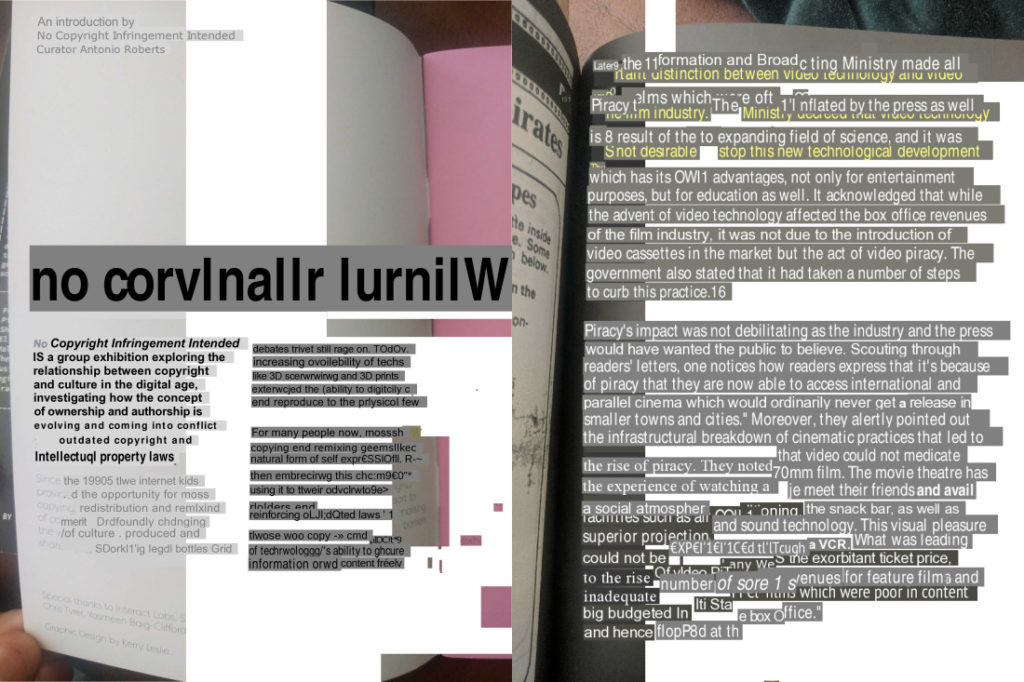
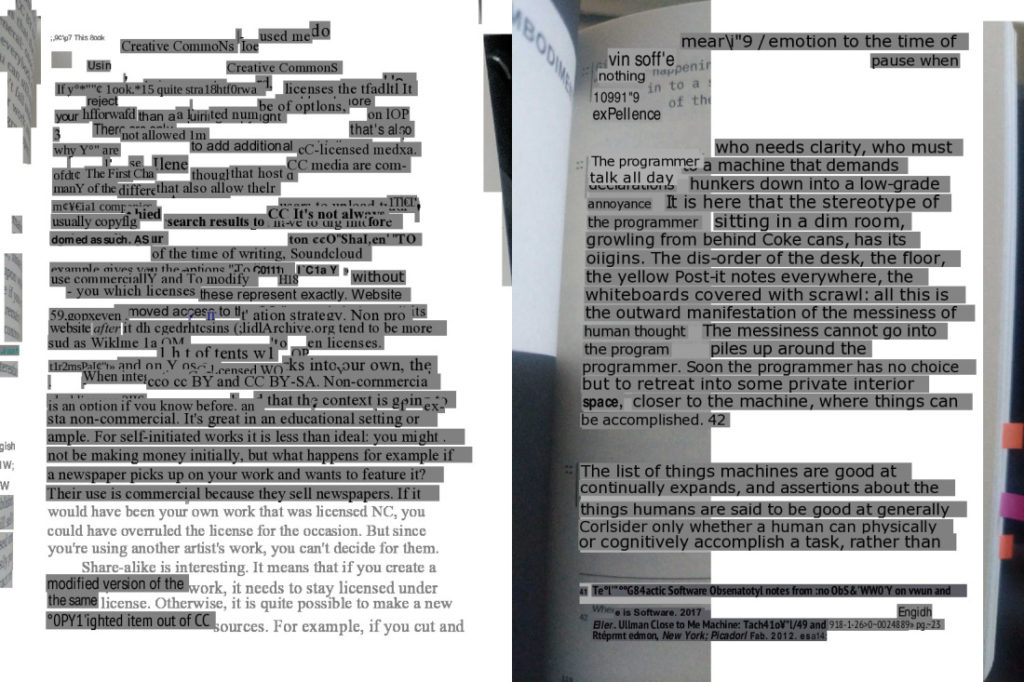
One of the things I liked about the software they used was that it showed you the image of the text that it recognised and extracted, producing a kind of cut-and-paste poetry.

To make the sixth video I wanted to somehow utilize this OCR and text-to-speech process and make a video collage of words and synthesized speech. The challenge was finding a way to do this using only open source software. Finding open source OCR software that works on Linux is not a problem. After a while I discovered that Tesseract is the gold standard for OCR software and that most other software act as frontends or interfaces to it. Here’s a few examples:

However, they all output only the text, and not the image of the extracted text. I’m aware that my use case is quite specific so I don’t blame the developers for this.

Eventually I took to Twitter and Mastodon with my questions. _vade pointed to a bug report on Tesseract which showed that getting the coordinates of recognised words is possible in Tesseract. If I knew the coordinates of words then perhaps I could use that to extract the image of the word. However, doing it this way required using it’s C interface and learning C wasn’t feasible at the time.

After some further digging around Tesseract I found a bug report that makes reference to hOCR files:

hOCR is an open standard of data representation for formatted text obtained from optical character recognition (OCR). The definition encodes text, style, layout information, recognition confidence metrics and other information using Extensible Markup Language (XML) in the form of Hypertext Markup Language (HTML) or XHTML.

This file looked like it contained the coordinate data I needed, and obtaining such a file from Tesseract was as simple as running one command. The next task was finding a tool (or tools) to interpret hOCR files. Here’s a selection, which should really be added the the previous list to form a mega-list:

hocr-tools proved to be the most feature complete and stable. It runs on the command line, which opens it up for easy automation and combining with other programs. After reading the documentation I found a process for extracting the images of words and even making videos from each word/sentence with synthesized speech. Here’s how I did it:

Generate hOCR file

First I needed to generate a hOCR file using Tesseract. For the example I used the first page from the first chapter of No Logo by Naomi Klein.

tesseract book.jpg book hocr

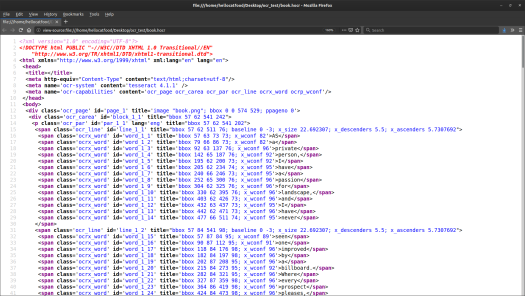
This produced a file called book.hocr. If you look at the source code of the file you can see it contains the bounding box coordinates of each word and line.

Extract images

Using the hOCR file I can extract images of the lines

hocr-extract-images -P 10 book.hocr

This generates both pngs of each line and also a corresponding text file containing the text

Text to speech

Using eSpeak I can generate a wav file of a synthesized voice reading each line.

for file in *.txt ; do espeak -z -f $file -w ${file%.*}.wav ; done

Make video clips

Finally, I needed to combine the png image of the text with the wav file of the synthesized speech into a video

for i in $(seq -f "%03g" 1 83) ; do ffmpeg -loop 1 -i line-$i.png -i line-$i.wav -c:v libx264 -tune stillimage -vf scale="width=ceil(iw/2)*2:height=ceil(ih/2)*2" -pix_fmt yuv420p -shortest -fflags +shortest ${i%.*}.mp4 -y ; done

I used fflags because without it the video was always adding a couple of seconds of silence.

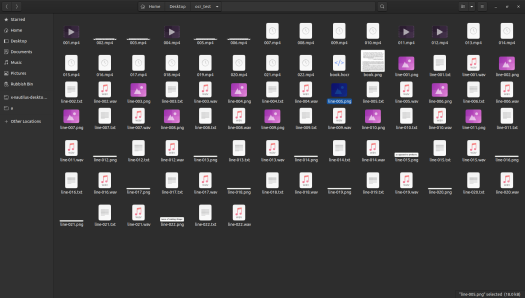
By the end of this I had a folder full of lots of files.

Voila!

The last part of this was to manually arrange the video clips into a video collage. I made this example video to demonstrate to the group what could be done.

Getting to this point took some time but with what I’ve learnt I can replicate this process quickly and simply. In the end the group decided no to use OCR to generate text and instead wrote something themselves. They did still use text-to-speech software and even filmed themselves miming to it. Here’s the finished video:

This was the last video I made for the Design Yourself project. I’ve written about techniques used to make older videos in past blog posts. Go read the Barbican website for more information on the project

Seamless Looping Neon Trail in Blender

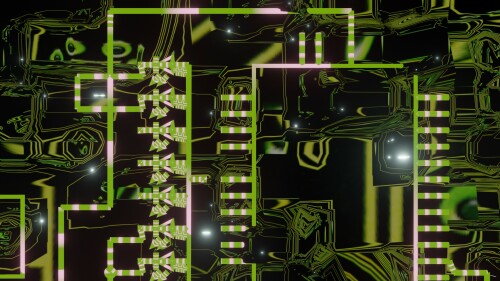
I’d like to return to the fifth video in the Design Yourself series to show how i did a glowing neon trail. The video is heavily themed around robots, and if you look in the background you’ll see that it’s actually a circuit board.

The circuit diagram was a random one I built using the rather excellent Fritzing software. If you’re ever looking for high quality SVG illustrations of electrical components then Fritzing is a great resource. I brought the exported SVG diagram into Blender to illustrate it a bit.

If you look closely you can see that the circuit board has a glowing trail. To achieve this effect I followed this tutorial:

At around 6:00 the author tries to find the point where the neon trail position loops but does it visually. At first I was doing the same but then I remembered that in the past I had faced a similar problem when trying to loop the Wave texture. To get an answer for that question I consulted the Blender Stackexchange site

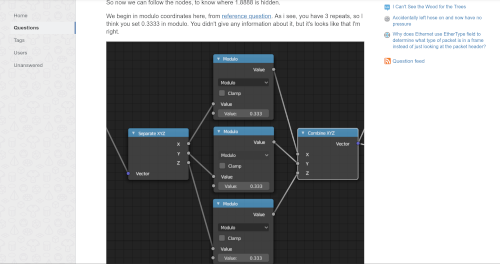
I adapted this a bit and came up with the following solution: To seamlessly loop the neon trail effect first insert keyframe with the Value of the Add node set to 0. Move to a point along the timeline where you want it to loop and add another keyframe to the Value of the Add node and type (0.3333*pi)/$scale (but replace $scale with whatever the Scale of the Wave texture is). My node setup is the same as in the video but here it is as well:

click to embiggen

Now when you play the animation the neon trail effect will loop seamlessly!

Typewriter Text Effect Revisited

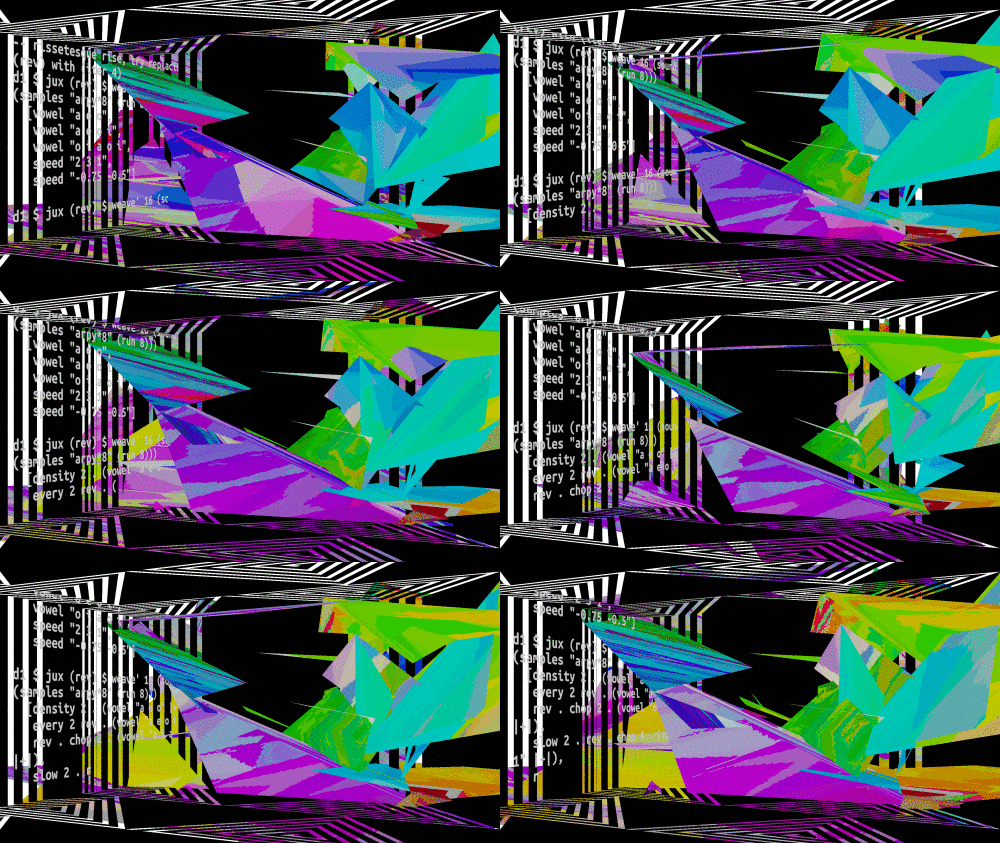
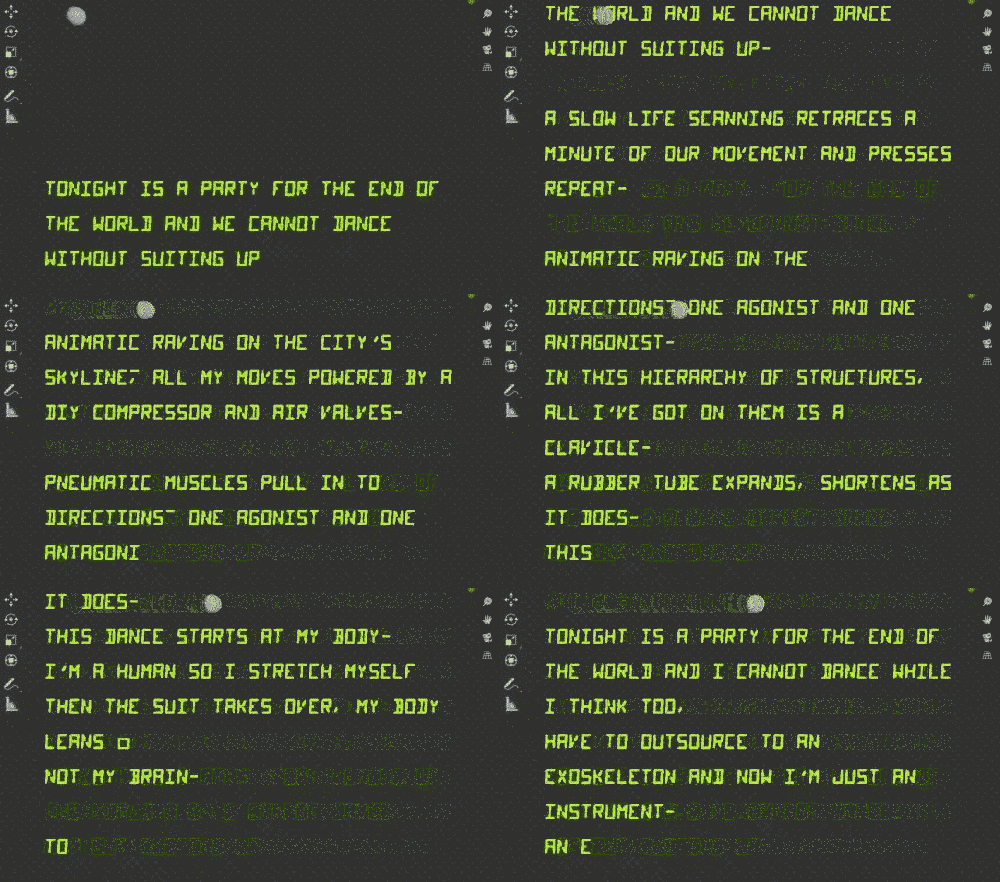
For the fifth video in the Design Yourself series I was faced yet again with the task of doing a typewriter text effect. Yay… For each of the videos the participants wrote a poem to go with it. The poems were a really important part of the video so they needed to have a prominent role in the video beyond standard Youtube subtitles. At the time I was producing the video I didn’t yet know whether or not I wanted to use the typewriter text effect but I certainly wanted to explore it as a possibility. One of the first times I tried to achieve this was back in 2019 when I was making the video to promote the Algorave at the British Library.

Since making that video, to add subtitles to a the second Design Yourself video I was using a Natron plugin that would allow synced playback of an audio file via VLC. By using this approach I could seek through the audio and add keyframes to the Text node when the text changed. This mostly worked but sometimes the audio did go out of sync. At some point afterwards I wondered if I could offload the editing of the subtitles – and maybe even subtitles with a typewriter text effect – onto another more specialised program and then import that into Natron later for compositing. Subtitle editing software already exist and are much better suited to editing subtitles than Natron.

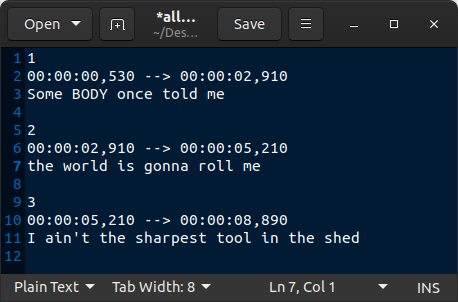
I explained this on the Natron forum to one of the developers and some time later the Text node gained the ability to read an SRT subtitle file! An SRT file subtitle file format that is widely used on video files. If you open one up you can see exactly how it works:

The way the SRT reading function works in the new Text node is it basically gets the time stamps of the text in the SRT file and assigns them to keyframes in the Text node.Yay! 🙂

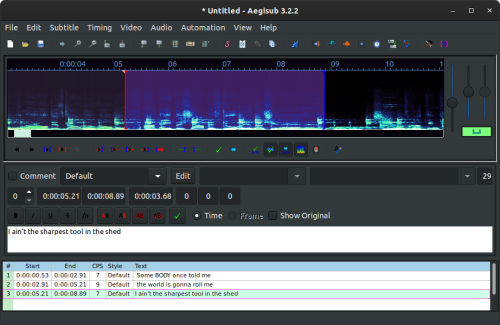
The next stage in the equation was to find a subtitle editor capable of doing a typewriter text effect. There are several open source solutions out there including Subtitle Composer and Gaupol. One of the available software, Aegisub, has quite the feature set. It has a karaoke mode which, as you would expect, can let you edit the timing of words as they appear on screen.

This sounds like the solution to my problem of getting a typerwriter text effect but there’s one big problem. The karaoke text mode only works if the file is exported as an .ssa file format. The SubStation Alpha file format supports lot of formatting options, including typewriter-like text effects. This is good except for Natron only supports .srt file format, and even if it did support .ssa files, I’d still want control over formatting.

To make this work in an SRT file what I needed was for , at user defined poitns, each word to be appended. For example:

1
00:00:00,000 --> 00:00:01,000
Some

2
00:00:01,000 --> 00:00:02,000
Some BODY

3
00:00:02,000 --> 00:00:03,000
Some BODY once

4
00:00:03,000 --> 00:00:04,000
Some BODY once told me

5
00:00:04,000 --> 00:00:05,000
Some BODY once told me the

6
00:00:05,000 --> 00:00:06,000
Some BODY once told me the world

7
00:00:06,000 --> 00:00:07,000
Some BODY once told me the world is

8
00:00:07,000 --> 00:00:08,000
Some BODY once told me the world is gonna

9
00:00:08,000 --> 00:00:09,000
Some BODY once told me the world is gonna roll

10
00:00:09,000 --> 00:00:10,000
Some BODY once told me the world is gonna roll me

It was clear that at this time the Aegisub SRT export can’t do this so in the meant time I made a feature request and reverted back to using the method I described in July 2019 Development Update which makes use of Animation Nodes.

But even then I had a few issues. To synchronise the text with the speech I was expecting that I could use keyframes to control the End value in Trim Text node. However, as explained by Animation Nodes’ developer, the keyframes of custom nodes aren’t visible on the Dope Sheet and so animate anyway. To get around this I used the suggestion by the developer:

I suggest you create a controller object in the 3d view that you can animate normally. Than you can use eg the x location of that object to control the procedual animation.

This worked in the viewer but not when I rendered it. What I instead got was just one frame rendered multiple times. This problem has been reported in Animation Nodes but the solutions suggested there didn’t work. Neither did doing an OpenGL render.

However, I came across this interesting bug repot . It seems like the crashing I was experiencing back in 2019 is a known bug. The solution suggested there was to use a script to render the project instead of the built in render function.

import bpy

scene = bpy.context.scene
render = scene.render
directory = render.filepath

for i in range(scene.frame_start, scene.frame_end):
scene.frame_set(i)
render.filepath = f"{directory}{i:05d}"
bpy.ops.render.render(write_still = True)

render.filepath = directory

The downside of this script is that it doesn’t show the animation being rendered. It also doesn’t allow you to set the start or end point of the render but that is easily accomplished by changing the range in line 7.

After all of that I was able to render the text with the rest of the video! Finished video is below:

I’m getting one step closer to being able to easily create and edit typewriter text using open source software…

Motion Interpolation for Glitch Aesthetics using FFmpeg part 9

Below are a few examples of how you can use FFmpeg’s minterpolate to create artworks with a glitch aesthetic.

You can read about how I used it for an artwork in this blog post. You can also grab the source file for these videos here. Give it a try yourself!

mc_mode=aobmc:me_mode=bilat:me=ds

ffmpeg -i cat_rainbow_original.mp4 -filter:v "setpts=62.5*PTS,minterpolate='fps=25:mb_size=16:search_param=400:vsbmc=0:scd=none:mc_mode=aobmc:me_mode=bilat:me=ds'" 033_mc_mode=aobmc_me_mode=bilat_me=ds.mp4

mc_mode=aobmc:me_mode=bilat:me=hexbs

ffmpeg -i cat_rainbow_original.mp4 -filter:v "setpts=62.5*PTS,minterpolate='fps=25:mb_size=16:search_param=400:vsbmc=0:scd=none:mc_mode=aobmc:me_mode=bilat:me=hexbs'" 034_mc_mode=aobmc_me_mode=bilat_me=hexbs.mp4

mc_mode=aobmc:me_mode=bilat:me=epzs

ffmpeg -i cat_rainbow_original.mp4 -filter:v "setpts=62.5*PTS,minterpolate='fps=25:mb_size=16:search_param=400:vsbmc=0:scd=none:mc_mode=aobmc:me_mode=bilat:me=epzs'" 035_mc_mode=aobmc_me_mode=bilat_me=epzs.mp4

mc_mode=aobmc:me_mode=bilat:me=umh

ffmpeg -i cat_rainbow_original.mp4 -filter:v "setpts=62.5*PTS,minterpolate='fps=25:mb_size=16:search_param=400:vsbmc=0:scd=none:mc_mode=aobmc:me_mode=bilat:me=umh'" 036_mc_mode=aobmc_me_mode=bilat_me=umh.mp4

This blog post is part of a series. Click the links below to see more examples of FFmpeg’s motion interpolation:

Motion Interpolation for Glitch Aesthetics using FFmpeg part 8

Below are a few examples of how you can use FFmpeg’s minterpolate to create artworks with a glitch aesthetic.

You can read about how I used it for an artwork in this blog post. You can also grab the source file for these videos here. Give it a try yourself!

mc_mode=aobmc:me_mode=bilat:me=tss

ffmpeg -i cat_rainbow_original.mp4 -filter:v "setpts=62.5*PTS,minterpolate='fps=25:mb_size=16:search_param=400:vsbmc=0:scd=none:mc_mode=aobmc:me_mode=bilat:me=tss'" 029_mc_mode=aobmc_me_mode=bilat_me=tss.mp4

mc_mode=aobmc:me_mode=bilat:me=tdls

ffmpeg -i cat_rainbow_original.mp4 -filter:v "setpts=62.5*PTS,minterpolate='fps=25:mb_size=16:search_param=400:vsbmc=0:scd=none:mc_mode=aobmc:me_mode=bilat:me=tdls'" 030_mc_mode=aobmc_me_mode=bilat_me=tdls.mp4

mc_mode=aobmc:me_mode=bilat:me=ntss

ffmpeg -i cat_rainbow_original.mp4 -filter:v "setpts=62.5*PTS,minterpolate='fps=25:mb_size=16:search_param=400:vsbmc=0:scd=none:mc_mode=aobmc:me_mode=bilat:me=ntss'" 031_mc_mode=aobmc_me_mode=bilat_me=ntss.mp4

mc_mode=aobmc:me_mode=bilat:me=fss

ffmpeg -i cat_rainbow_original.mp4 -filter:v "setpts=62.5*PTS,minterpolate='fps=25:mb_size=16:search_param=400:vsbmc=0:scd=none:mc_mode=aobmc:me_mode=bilat:me=fss'" 032_mc_mode=aobmc_me_mode=bilat_me=fss.mp4

This blog post is part of a series. Click the links below to see more examples of FFmpeg’s motion interpolation:

Motion Interpolation for Glitch Aesthetics using FFmpeg part 7

Below are a few examples of how you can use FFmpeg’s minterpolate to create artworks with a glitch aesthetic.

You can read about how I used it for an artwork in this blog post. You can also grab the source file for these videos here. Give it a try yourself!

mc_mode=obmc:me_mode=bilat:me=hexbs

ffmpeg -i cat_rainbow_original.mp4 -filter:v "setpts=62.5*PTS,minterpolate='fps=25:mb_size=16:search_param=400:vsbmc=0:scd=none:mc_mode=obmc:me_mode=bilat:me=hexbs'" 025_mc_mode=obmc_me_mode=bilat_me=hexbs.mp4

mc_mode=obmc:me_mode=bilat:me=epzs

ffmpeg -i cat_rainbow_original.mp4 -filter:v "setpts=62.5*PTS,minterpolate='fps=25:mb_size=16:search_param=400:vsbmc=0:scd=none:mc_mode=obmc:me_mode=bilat:me=epzs'" 026_mc_mode=obmc_me_mode=bilat_me=epzs.mp4

mc_mode=obmc:me_mode=bilat:me=umh

ffmpeg -i cat_rainbow_original.mp4 -filter:v "setpts=62.5*PTS,minterpolate='fps=25:mb_size=16:search_param=400:vsbmc=0:scd=none:mc_mode=obmc:me_mode=bilat:me=umh'" 027_mc_mode=obmc_me_mode=bilat_me=umh.mp4

mc_mode=aobmc:me_mode=bilat:me=esa

ffmpeg -i cat_rainbow_original.mp4 -filter:v "setpts=62.5*PTS,minterpolate='fps=25:mb_size=16:search_param=400:vsbmc=0:scd=none:mc_mode=aobmc:me_mode=bilat:me=esa'" 028_mc_mode=aobmc_me_mode=bilat_me=esa.mp4

This blog post is part of a series. Click the links below to see more examples of FFmpeg’s motion interpolation:

Motion Interpolation for Glitch Aesthetics using FFmpeg part 6

Below are a few examples of how you can use FFmpeg’s minterpolate to create artworks with a glitch aesthetic.

You can read about how I used it for an artwork in this blog post. You can also grab the source file for these videos here. Give it a try yourself!

mc_mode=obmc:me_mode=bilat:me=tdls

ffmpeg -i cat_rainbow_original.mp4 -filter:v "setpts=62.5*PTS,minterpolate='fps=25:mb_size=16:search_param=400:vsbmc=0:scd=none:mc_mode=obmc:me_mode=bilat:me=tdls'" 021_mc_mode=obmc_me_mode=bilat_me=tdls.mp4

mc_mode=obmc:me_mode=bilat:me=ntss

ffmpeg -i cat_rainbow_original.mp4 -filter:v "setpts=62.5*PTS,minterpolate='fps=25:mb_size=16:search_param=400:vsbmc=0:scd=none:mc_mode=obmc:me_mode=bilat:me=ntss'" 022_mc_mode=obmc_me_mode=bilat_me=ntss.mp4

mc_mode=obmc:me_mode=bilat:me=fss

ffmpeg -i cat_rainbow_original.mp4 -filter:v "setpts=62.5*PTS,minterpolate='fps=25:mb_size=16:search_param=400:vsbmc=0:scd=none:mc_mode=obmc:me_mode=bilat:me=fss'" 023_mc_mode=obmc_me_mode=bilat_me=fss.mp4

mc_mode=obmc:me_mode=bilat:me=ds

ffmpeg -i cat_rainbow_original.mp4 -filter:v "setpts=62.5*PTS,minterpolate='fps=25:mb_size=16:search_param=400:vsbmc=0:scd=none:mc_mode=obmc:me_mode=bilat:me=ds'" 024_mc_mode=obmc_me_mode=bilat_me=ds.mp4

This blog post is part of a series. Click the links below to see more examples of FFmpeg’s motion interpolation: